November 2, 2025 3D
Not sure if there is a definition for ‘vibe 3D printing’, but watch me do it, LOL. I bought my daughter a 3D printer for her birthday half a year ago. She prints a bunch of cool stuff from printables.com or does simple models in tinker. Some of the models she is printing are crazy complexity and quality. I was wondering how much 3D printing I can learn/do in just half a day or so. Here we go.
Project: creating custom magnet with topographical map featuring engraved run from STRAVA.
This is the end result:

The context is that I used to go on 10k runs with friends around Burnaby Lake in British Columbia. I no longer live there but my memory of good weekly Sunday runs remains.
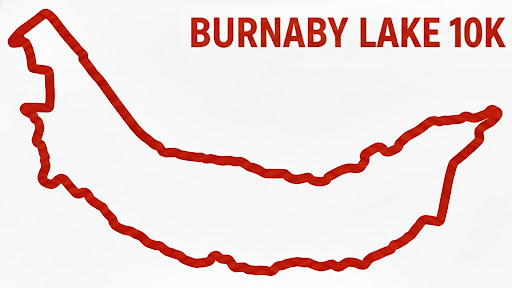
Step 1: Extracting Run Trail
First I went to my strava runs and took a screenshot of an actual run. Now, a more correct way would probably be to fetch GPS coordinates either from Garmin or Strava, nevertheless I started with images in a true “vibe mode”.

Now, I only wanted to extract this red line into a 3D object. I expected this to be fairly challenging for someone like me who knows nothing about 3D printing, photoshop or other tooling, so I used Gemini LLM. I convinced LLM to convert this image to just a red line and white background. This took quite a few prompts, but it worked much quicker than it would take me to figure this out in a proper tool. I got this:
Next, I wanted to get a 3D model out of this, the issue is that the image is JPG. I tried some AI software called MeshyAI, but it generated a really bad 3D model, so instead I used a multi-step process. I used some online tool to convert my JPEG into SVG, so I can programmatically work with it (yeah, now GPS coordinates would have been better).
Step 2: Run Trail Map => 3D Model
Next, I vibe coded python script to use Blender’s tools to convert SVG to STL (3d printing file).
https://github.com/andriybuday/burnaby_lake/blob/main/svg_to_stl.py In my vibe-coding I also added platform so I can print it right away and validate it looks ok.
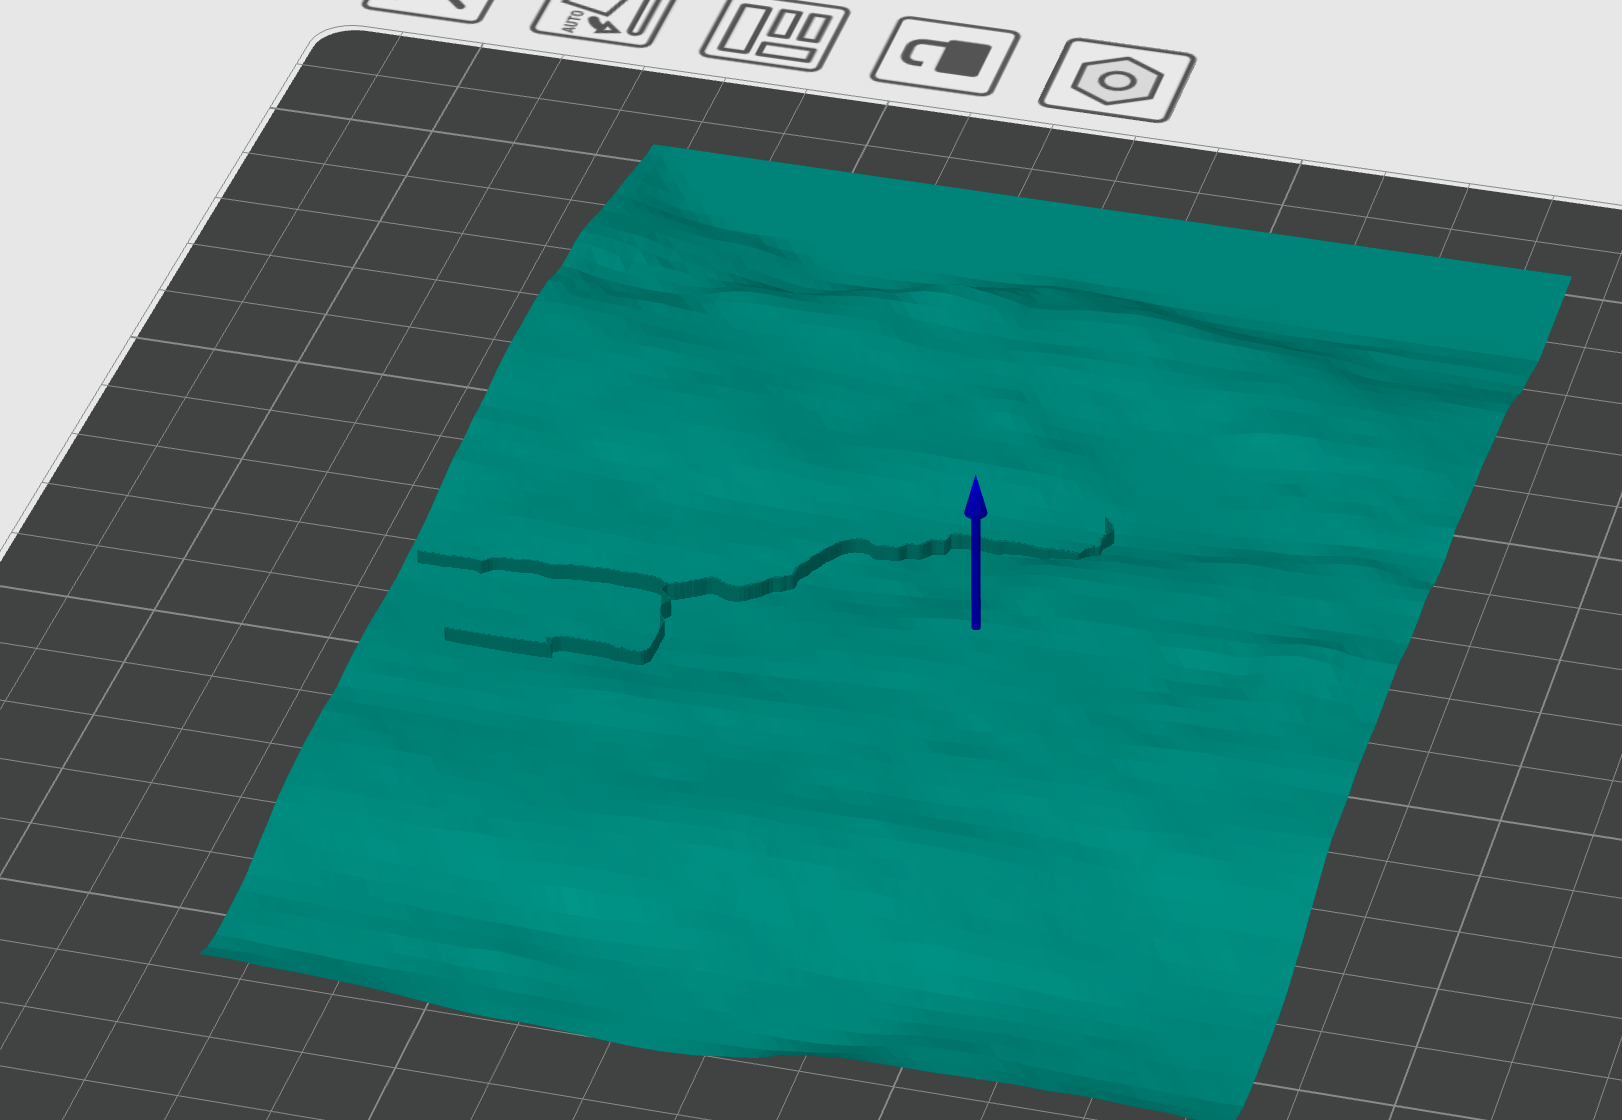
So now I got some reasonable 3d printable trail map, which you can see below in OrcaSlicer:
Step 3: Topological Base
Next, I wanted to take this even further and generate a topological map, potentially with buildings. Turns out there is an add-on “Blender GIS” for Blender software. I had to register at https://opentopography.org/ in order to get an API key for retrieval of topology. This is where things got a bit more complicated. Specifically, I could print buildings but the elevation wasn’t printing.
Next I had to export this into another STL with buildings on top of the topology.

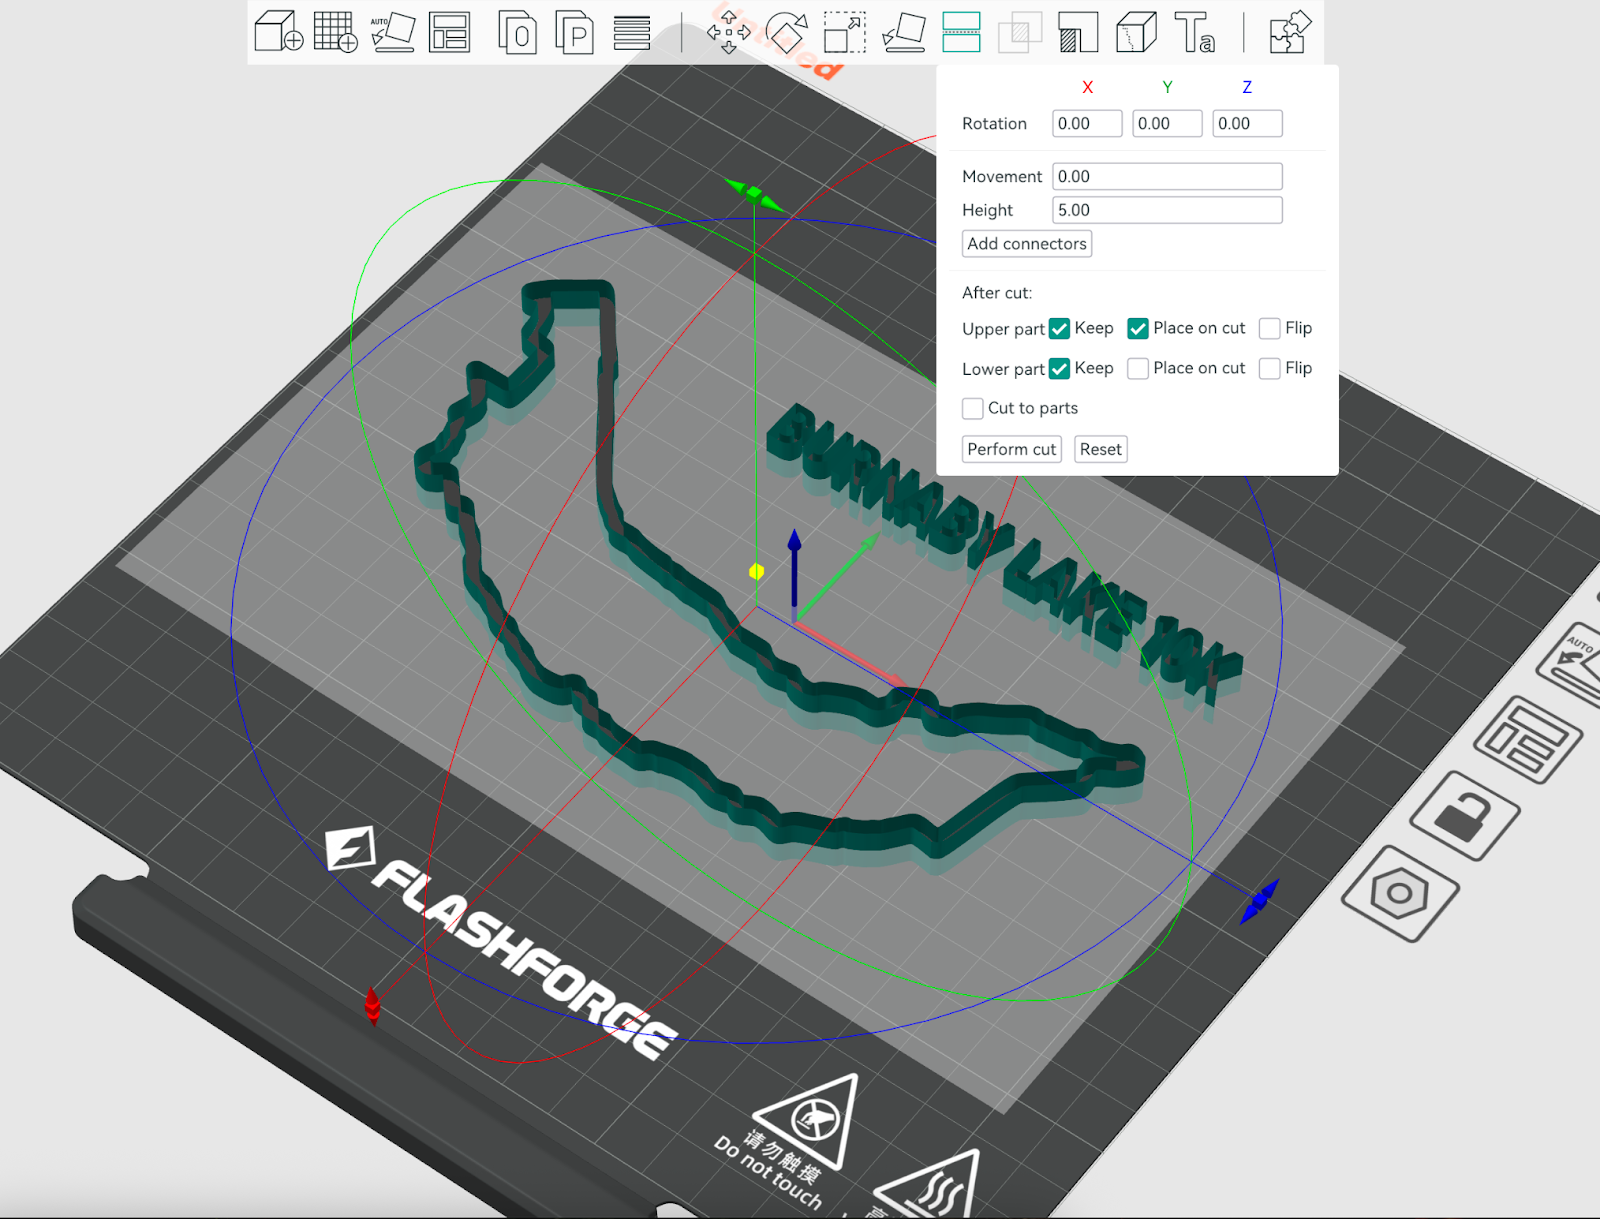
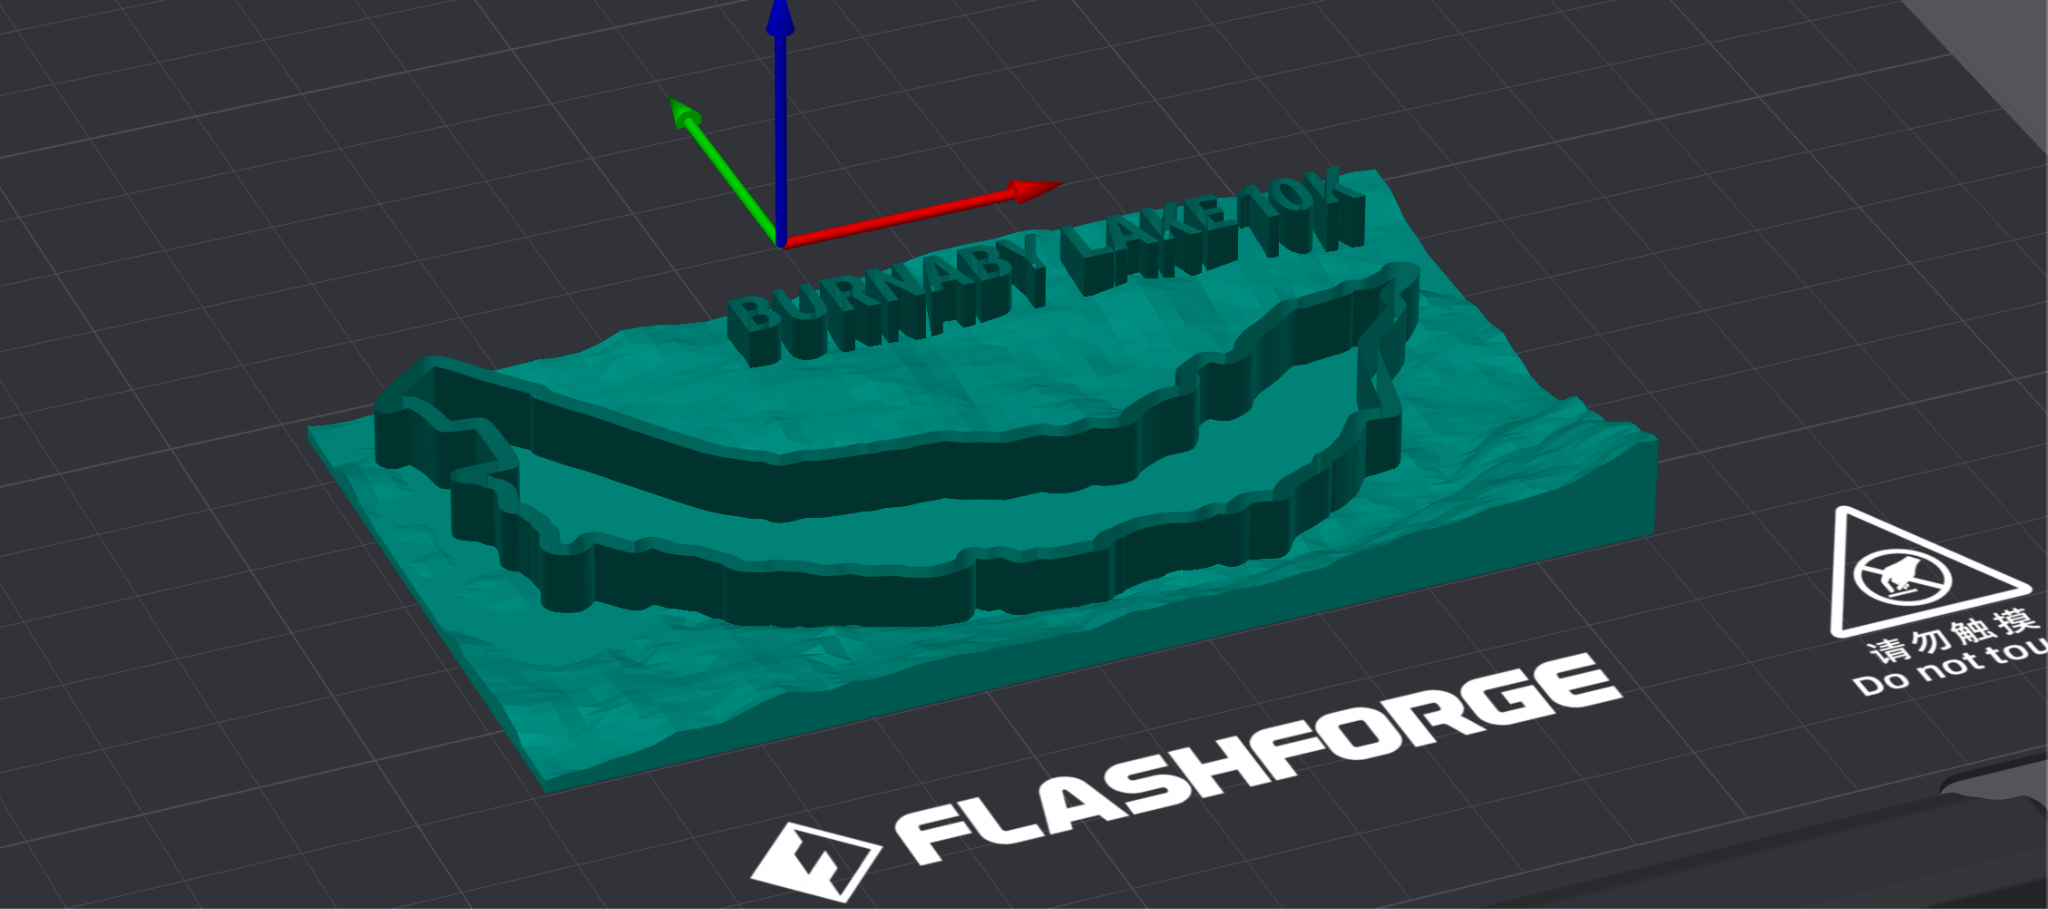
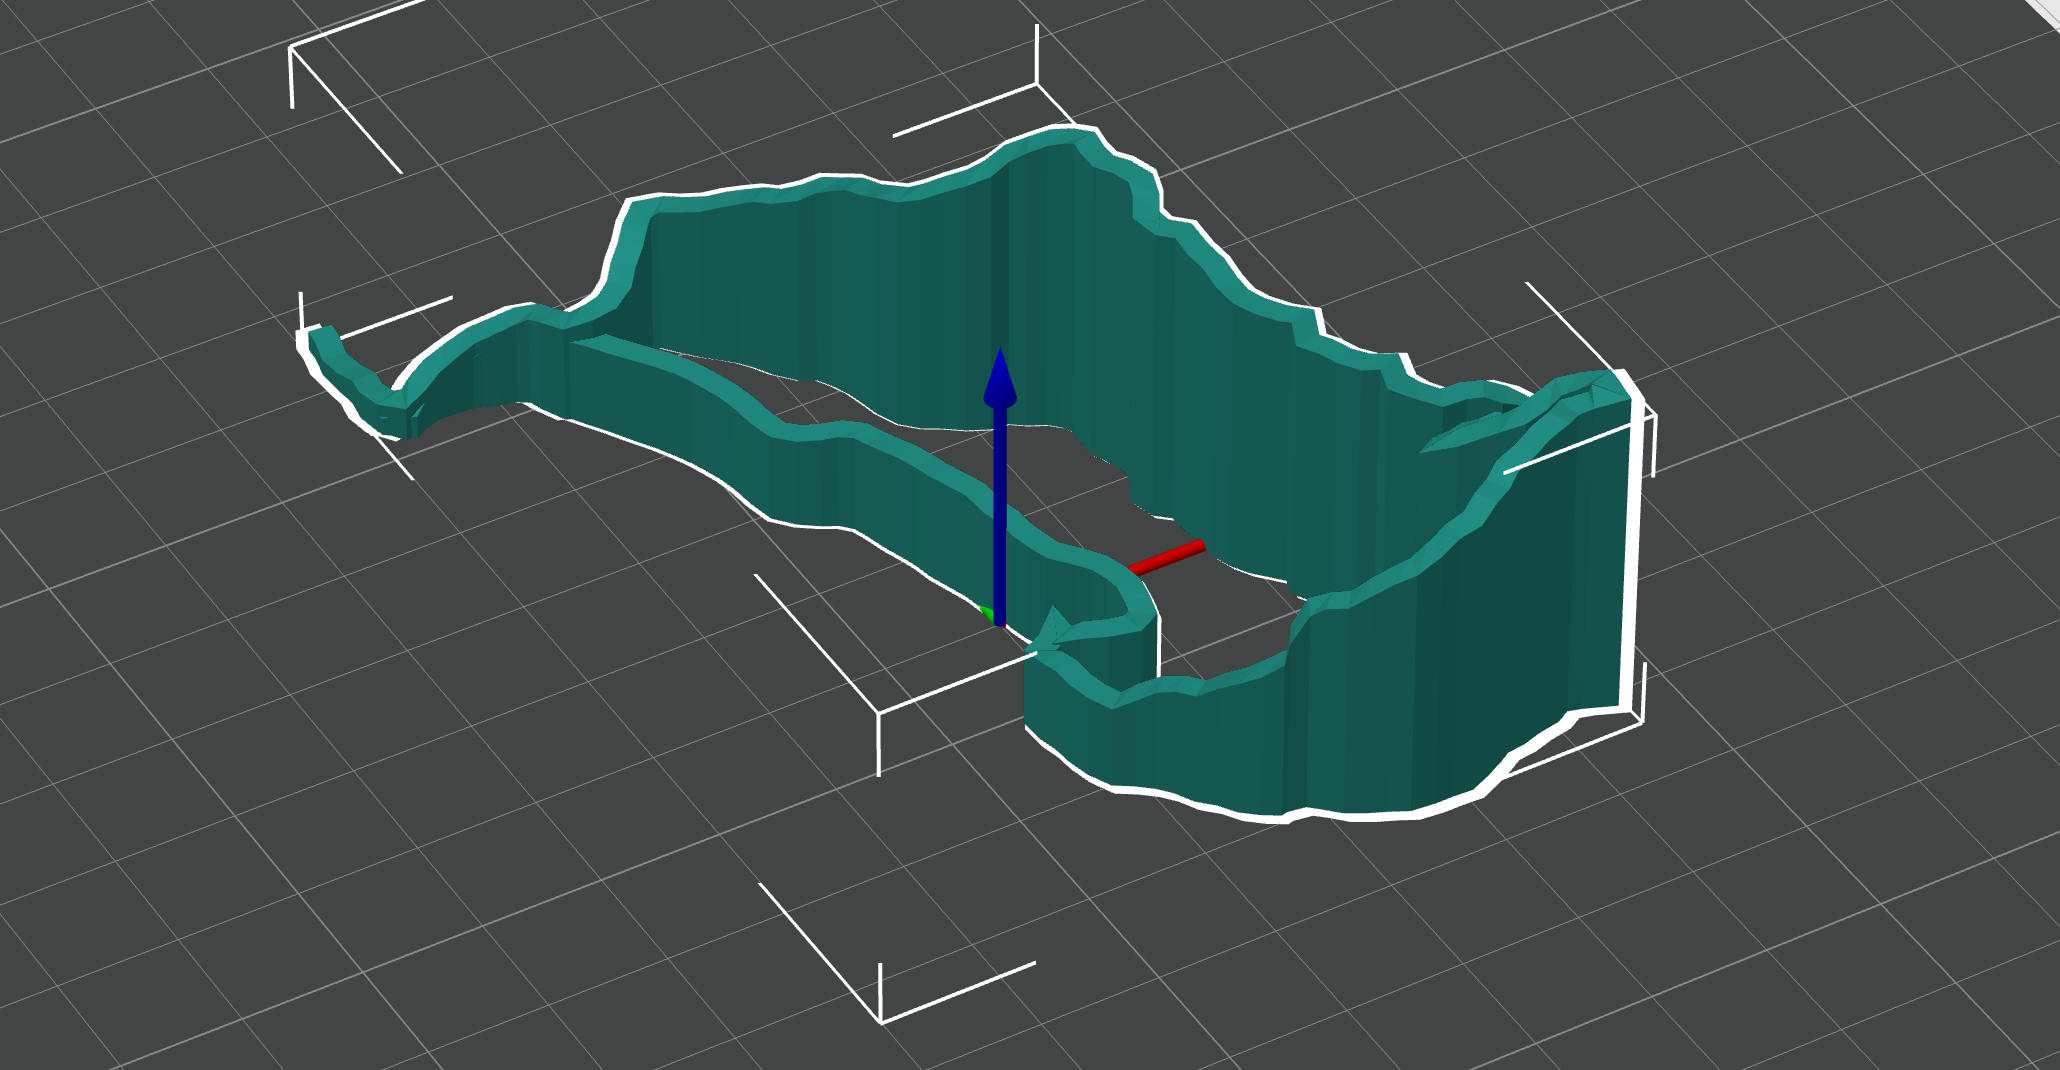
Step 4: Merging in Orca Slicer
Now that I had different objects prepared, I went to add them to Orca Slicer. The most challenging part with terrain was that it wasn’t printing because it was just a surface floating in the air instead of filled-in mesh, so the technique that worked for me was to assemble Cube and meshed terrain from Blender and then do Mesh binary difference between the two, leaving the bottom part of the Cube that was sliced by the terrain. This is what I got in the model:
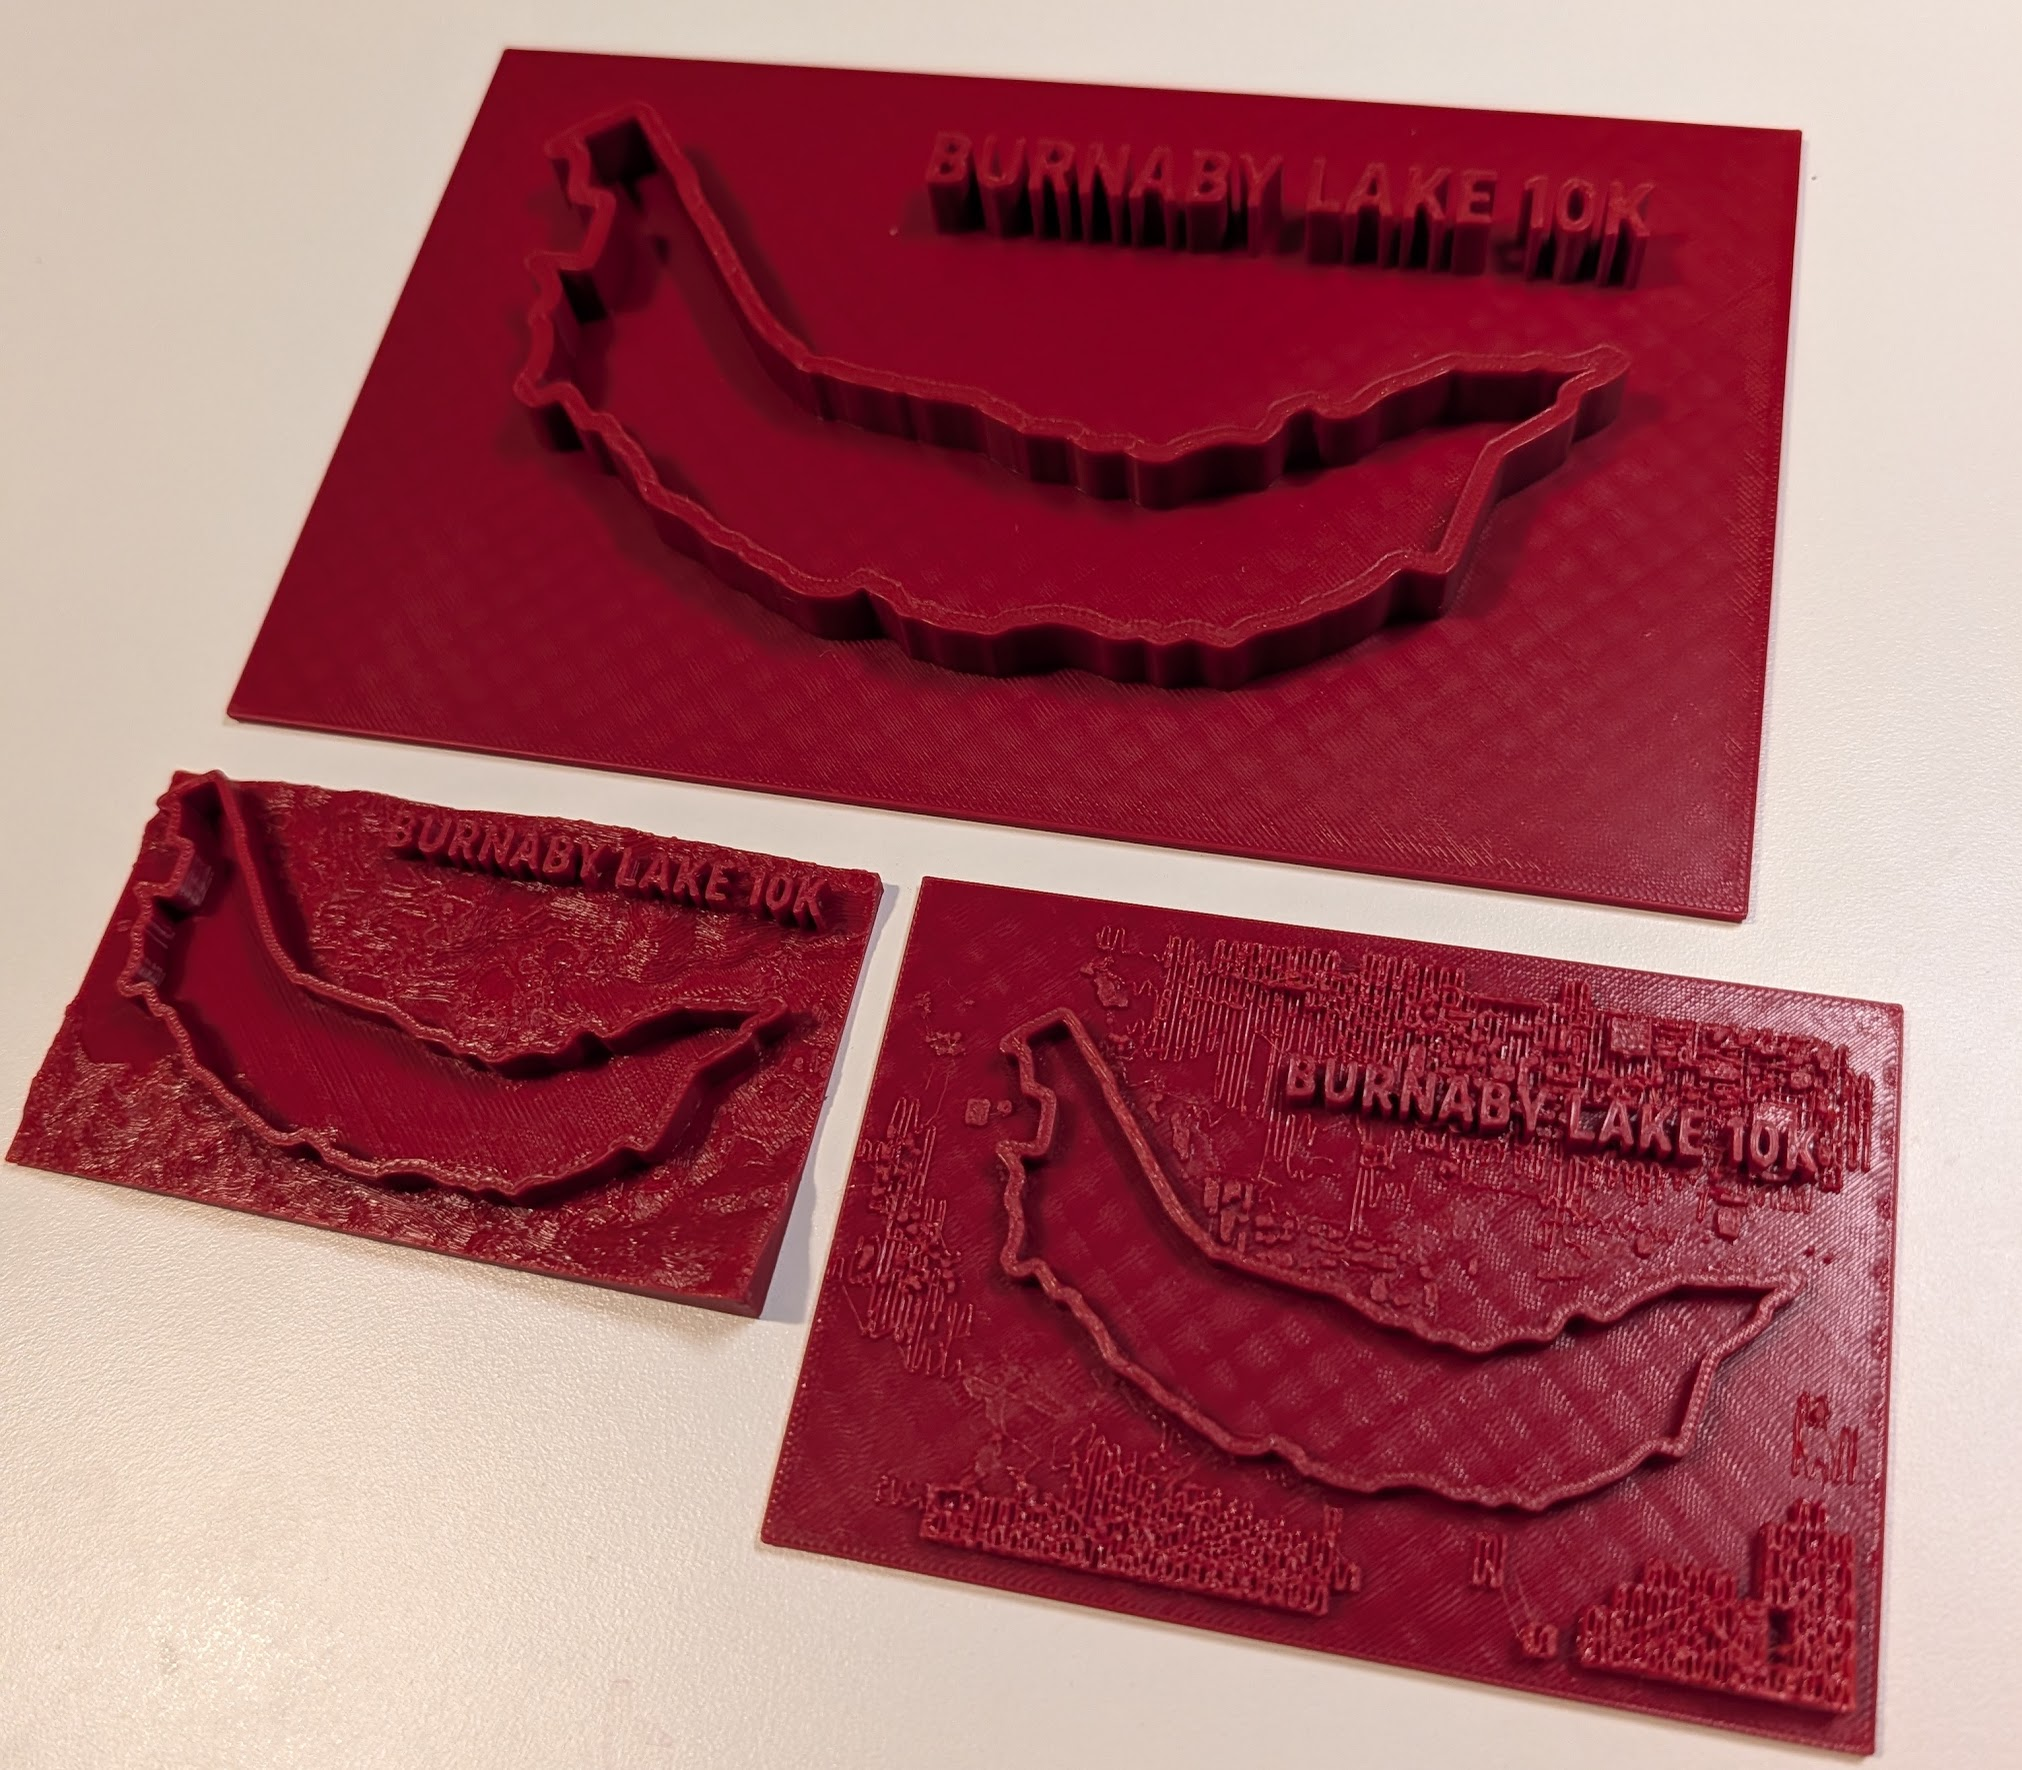
Step 5: Printing
Turns out that printing tiny buildings actually doesn’t work too well so I stopped on just using the terrain and the trail. Here are 3 results:
Step 6: Strava Plugin: trail to 3D Model
Registered with strava API, then vibe-coded the tool that retrieves GPS coordinates and changes them to SVG. SVG is already importable into Orca slicer and Blender.
Here is the git repo: https://github.com/andriybuday/strava/tree/main/strava-plugin
It would take another day to actually make properly working nice plugin, but next time around I would have some building blocks in place.
Yesterday’s activity on strava: https://www.strava.com/activities/16326534438
Same activity after running my tool and manual overlap with terrain:
Conclusion
I think my conclusion is that building things is cool. In this post I was able to combine wild usage of AI for image augmentation, vibe-coding python to convert SVG to STL, vibe-coding STRAVA integration, and a bunch of googling & LLM-ing to find answers to my questions, and then sitting with my daughter and fighting Mesh boolean operation. Cool stuff.
P.S. Found this tool that almost does what I’ve done here except it doesn’t export the entire terrain: https://gpxtruder.xyz/ Result of exporting of my today’s hike:

codemore code
~~~~